Installing Sass, Compass and Scout
I’ve had a few conversations recently about CSS pre-processors (my life isn’t all car chases and crime fighting) and have been dabbling with different things myself. They’ve definitely changed the way I think about my CSS and, on doing a direct comparison of two very similar projects, using a pre-processor saved me a large chunk of time on the inital build, despite the fact I’m probably using it at a very simple level.
A few people grumbled that they drifted toward LESS (which is also great) or didn’t even try a pre-processor, purely because Sass was a pain to set up. As I remember finding it awkward myself, I thought I’d give a quick run-through of what I did.
NB. Before I get started, if you don’t like the Command Line – and I emphatically don’t – you may want to try out Scout App first. Scout runs in a “self-contained Ruby environment” and gives you a UI to manage your Sass projects. In the end, I found this saved me time and effort, but some people do prefer the hands-on approach.
Installing Ruby
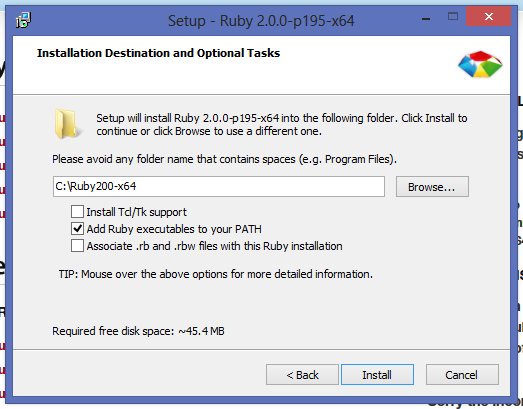
The worst part of setting up Sass is dealing with Ruby and the Command Line. Download the latest Ruby Installer and let ‘er rip, but when you get to the screen below make sure you check Add Ruby executables to your PATH.
Installing Sass using the Command Line
Open up the Command Line:
Start > Run > type “cmd”.
Once the window opens, type:
gem install sass
After a few moments, the window should look like this:
If you get the message “ruby is not recognized as an internal or external command” instead, Ruby is not installed correctly, so you may want to go back a step.
Installing Compass
If you want to install Compass, keep the Command Line open for a second. Compass is an open-source CSS framework which uses Sass and provides a ton of extra benefits. Type the following in the command line, and give it a few moments to install:
gem install compass
Boosh! You’re installed and good to go! I won’t go through the actual commands used to create, watch and navigate projects as that’s fairly well documented, but hopefully this will help with the initial set up!